Wednesday, May 25, 2016

Weddings Galore!

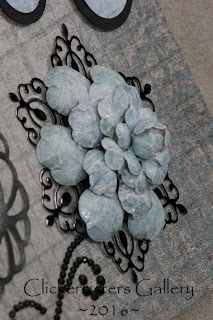
More weddings! And it isn't even June yet! Here is another beautiful name frame for another fabulous young couple. This is my project for the new challenge over at Decorate to Celebrate! It's always "Anything Goes", so I hope you'll create a project and join us!

I have heard from friends that I have a unique way of doing these (read: easy) and I thought maybe a tutorial might be helpful for readers who are interested in making their own. Please leave a comment or message me and I'll start working on one. K?


Thanks for stopping by today!


Tuesday, May 24, 2016

Coffee with Friends

Hello! Today is the new challenge over at {PIN}spirational Challenges, and today I have a gift bag for you. This was made with a stamp and die from Heartfelt Creations. 
Create your own project from the inspiration pic and join us! Thanks for stopping by!

Sunday, May 15, 2016

Memories


Hi friends! I'm excited to be bringing you a tutorial for making a Memories wall hanging. Let's get started!


Supply list:
Chipboard sign
Acrylic paint and brush
Coordinated papers and tags
Ribbon and crochet thread
Dew Drops
Die cuts
Flowers, mini clothes pins, other embellishments
Glue, glue gun, glue dots


The first thing I did was paint the edge and the areas that would show between the letters. I just used an off-white acrylic paint for this.


Then I chose the papers that I wanted to use. I chose colors that looked good together, and patterns that could coordinate with each other.


I turned the chipboard upside down on my chosen paper and traced it, then trimmed on the inside of the line to get the shape of the letter. For some of the letters I used a solid paper on the bottom, and a patterned paper on the upper part.


Following is the paper after it's glued on to the first letter.


I used a border die to create the fancy border before I cut out the top portion of the letter. 


The first letter is finished!


Using the same technique, I cut out the remaining paper and applied it to the letters.


Some of the letters couldn't "connect" all the way while tracing. I just had to follow an imaginary line around the letter while cutting, and it worked just fine!


I added flowers, ribbons, bows, and other embellishments, along with some keys and tags hanging from the letters. And I added Dew Drops, of course! Here are some close up shots of the embellishments.


The completed project is just so cute!


Thanks for stopping by today!


Wednesday, May 11, 2016

Bridal Carriage

It's getting to be that time of year again! Lots of weddings and receptions to attend! And here's a sweet little treat for the bride...a carriage!


Today is the new challenge over at Decorate to Celebrate, and I've created this cute treat box! It's a file from SVG Attic.

This was a really simple, but really cute project. I will be giving this to my friend for her daughter's bridal shower. Thanks for stopping by today!


Tuesday, May 10, 2016

Camping Life For Me

Camping. No more words needed. 


Except fishing. Camping and fishing. 

And papercrafting to tie it all together! Today is the new challenge at {PIN}spirational Challenges. I've created a scrapbook page using the set called The Great Outdoors from Imagine That Digis. This is already colored and ready to print and cut out as embellishments. Great fun for this page with my camping friends! Thanks for stopping by today!

Wednesday, May 4, 2016

Blue Miracle Bridge

This is my favorite photo. Ever. Except for my family, of course. This was one of the highlights of our perfect trip to Germany, and I just had to make a super-special scrapbook page for it! 


I used Heartfelt Creations and Spellbinders Grande dies. This close-up photo shows a fun technique that I did. I printed my own toner paper from a laser printer, then die cut the fancy doily and ran it through my Minc machine to put the black foil on it. It worked perfectly! 

Thanks for stopping by today! Have a blessed day! Hugs, Debb