This is my tutorial for the Christmas Lantern. I think these would look so cute on a mantel with some Christmas greenery, and then in the spring you could add some spring flowers and a bird to make a wonderful display! Please leave a comment for me so that I can improve my tutorials! I would also love to see your creations!
This is the lantern template.
http://www.scribd.com/doc/44937141
I had to enlarge it to 153% to get it to print the correct size. If you have problems, here are the exact sizes that the pieces need to be, and the directions for cutting them to the correct size.
Supplies for this project are:
Black 8 1/2 X 11 paper (3) pieces
White glitter paper 12 X 12 (1) piece or large scrap at least 12" long
Vellum 8 1/2 X 11 paper (1) piece
Scor-Pal
Scissors
Decorative punch
Oval cutter
Paper cutter
Pencil
Ribbon
Adhesive
Decorative element for the top
For the lantern, you will need to use the template, or use these directions to cut out the pieces:
You'll need (4) 4" X 4 1/2" black pieces

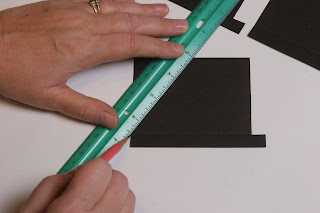
To each piece you will use the top left corner of the long side as your first point to mark with pencil. Then mark the top edge at 3 7/8.


Mark the bottom edge at 1/2" and 3 3/8".


Draw a line from the top mark to the bottom mark on the left side, then again on the right side.


Now mark 1/2" away from that line on the right side and draw another line.


Cut on the OUTSIDE lines only.

Score on the inside line and fold back

Snip off the top part of the the flap.

Cut out the oval center. If you need a center line, it's 2 15/16".

Cut (4) pieces of vellum 2 1/2" X 3 1/2". Adhere to the back of each lantern piece that you just created.


Base is 3 7/8" square.

Score 1/2" in from each side.


Trim each corner out inside the score lines and fold on the score lines.


Adhere lantern side to lantern base, being careful not to adhere flap. It gets a little tricky at this point, but you can do it!

Adhere the second side to the first side, then to the base.


Continue with the remaining sides.


The post is 6 1/2" X 4".

Put STRONG adhesive (I used Scor-Tape) on one short end, the carefully roll and attach with less than 1/2" overlap.


To connect the post to the base, use 4 scraps of black paper about 1/4" X 1", then fold in half.

Adhere one half into the post, then turn 1/4 turn and adhere the next one, continuing until all 4 are attached.

Test and mark your placement of the post onto the center of the bottom, then adhere in place.

Take a 3/4" X 6 1/2" piece of the glitter paper and use your decorative punch ( I used a Martha Stewart punch) on one long side.

Adhere to the bottom.

See Lantern Tutorial Part 2 for the lid and the remainder of the construction!


